Deploying Quartz to the Web
# Hosting on GitHub Pages
Quartz is designed to be effortless to deploy. If you forked and cloned Quartz directly from the repository, everything should already be good to go! Follow the steps below.
# Enable GitHub Actions
By default, GitHub disables workflows from running automatically on Forked Repostories. Head to the ‘Actions’ tab of your forked repository and Enable Workflows to setup deploying your Quartz site!
 Enable GitHub Actions
# Enable GitHub Pages
Head to the ‘Settings’ tab of your forked repository and go to the ‘Pages’ tab.
- (IMPORTANT) Set the source to deploy from
master(and nothugo) using/ (root) - Set a custom domain here if you have one!
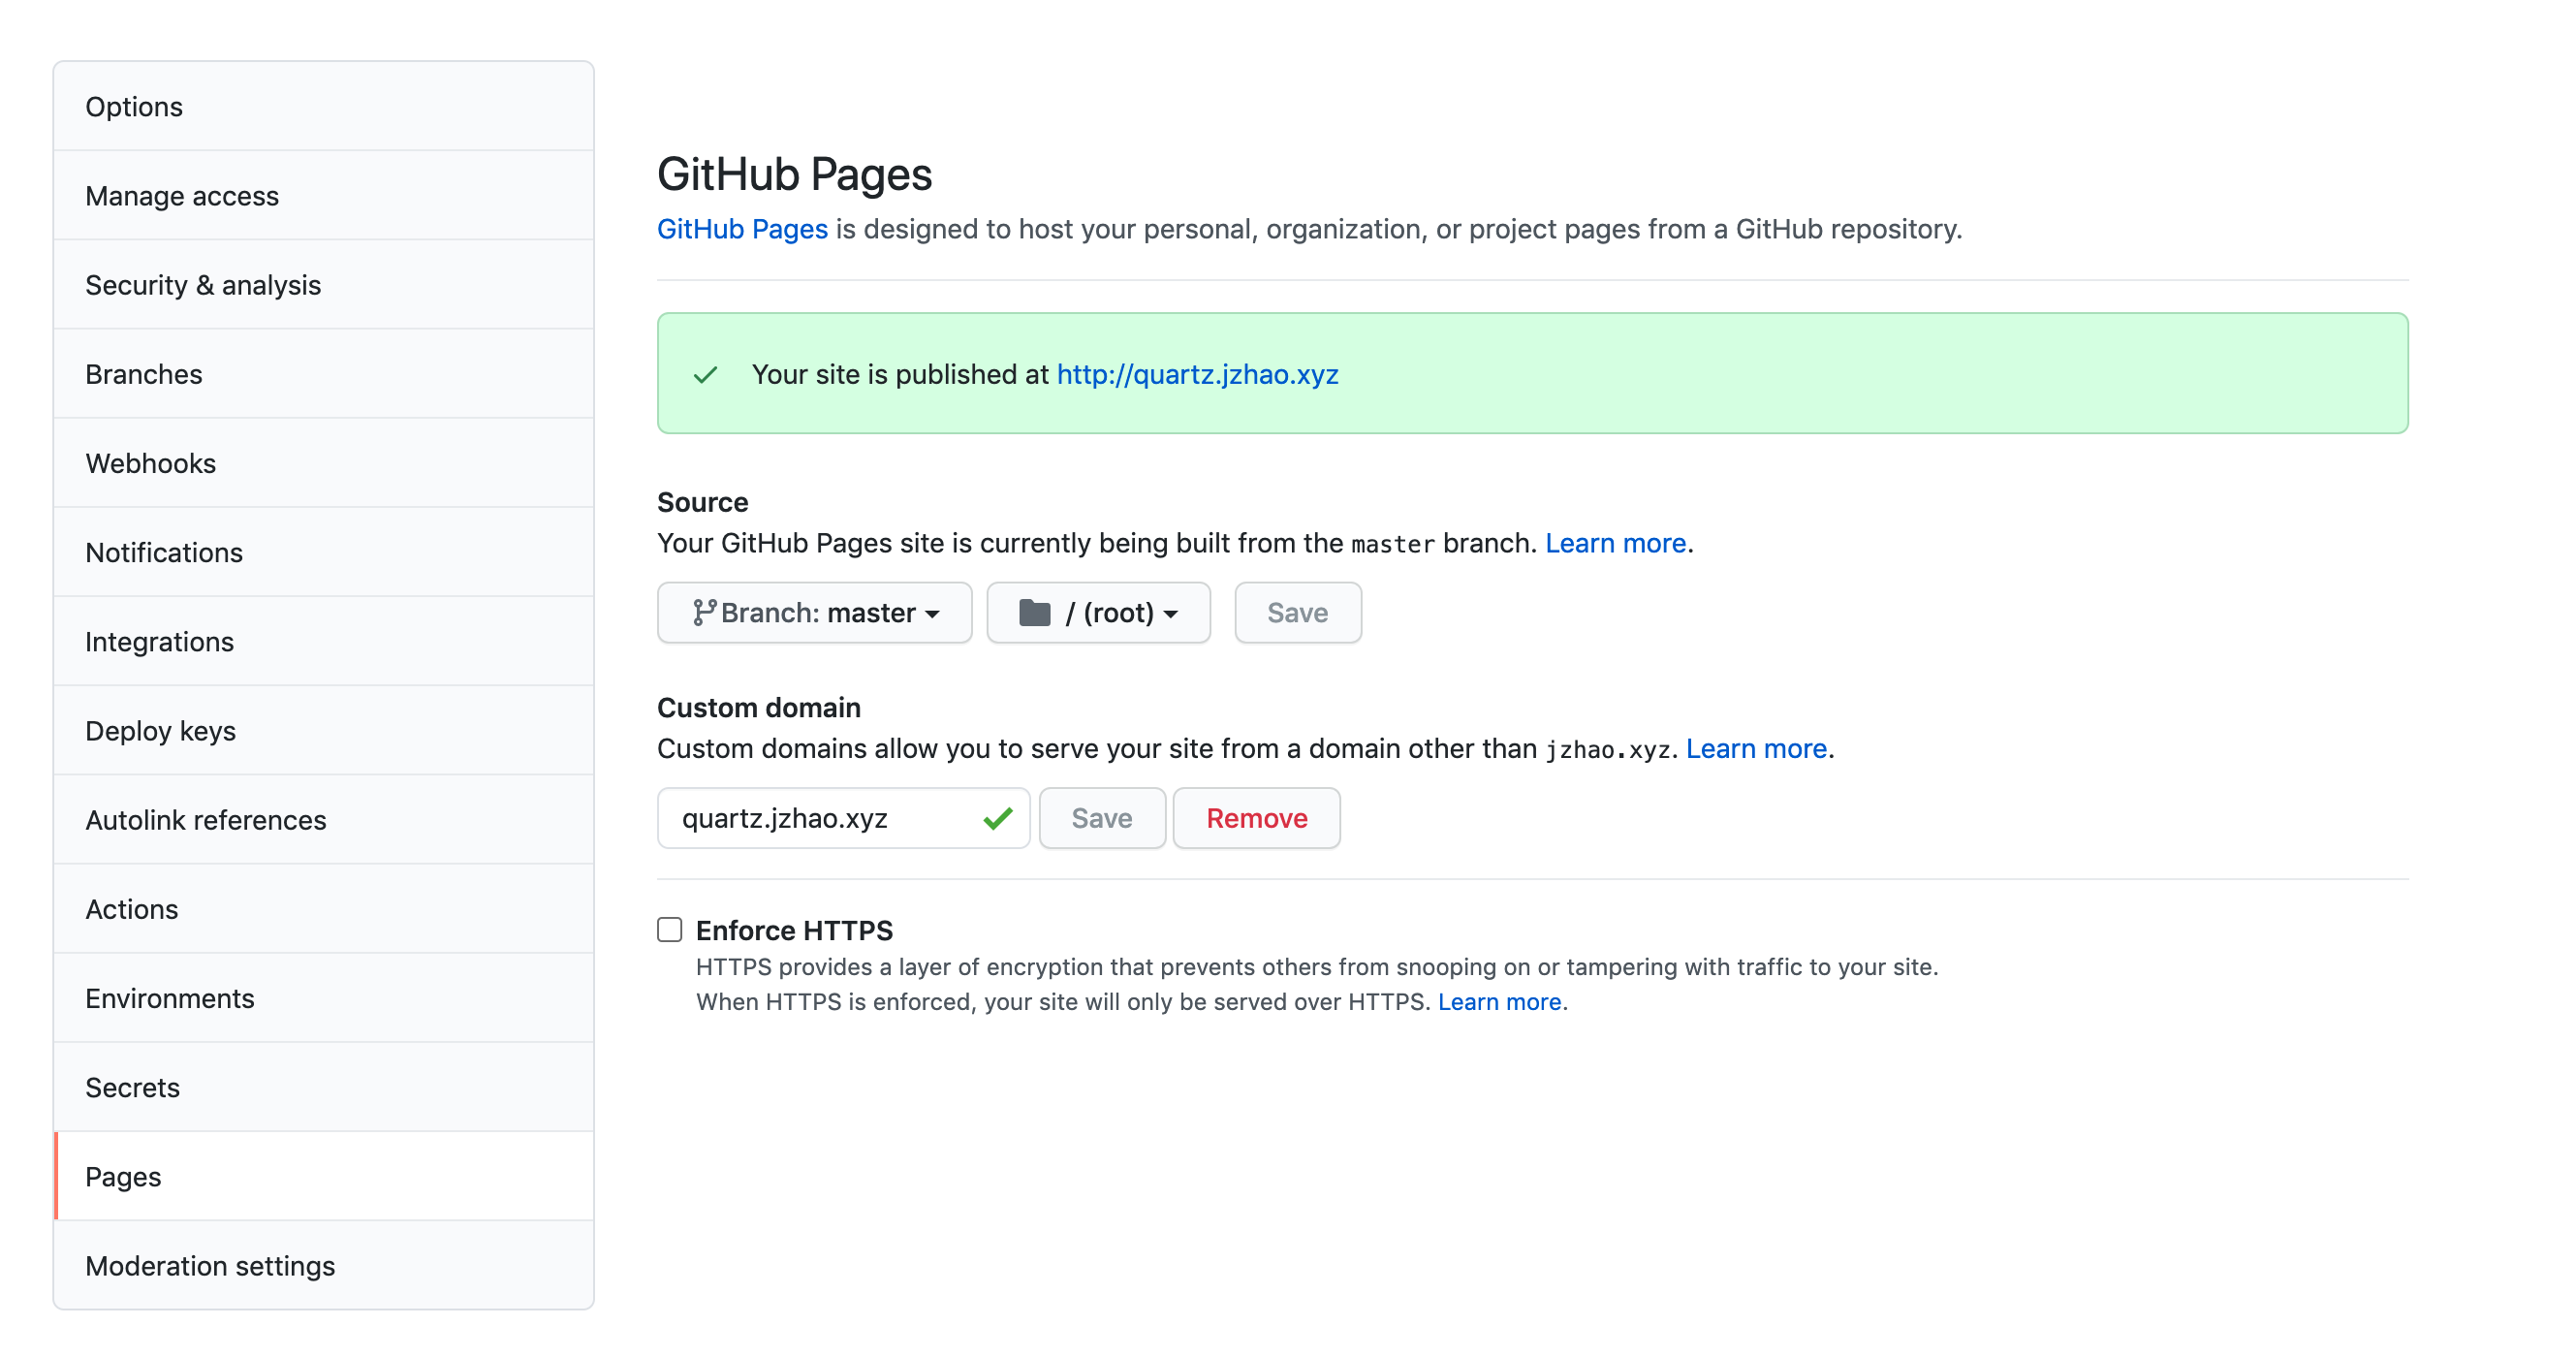 Enable GitHub Pages
# Pushing Changes
To see your changes on the internet, we need to push it them to GitHub. Quartz is a git repository so updating it is the same workflow as you would follow as if it were just a regular software project.
| |
Note: we specifically push to the hugo branch here. Our GitHub action automatically runs everytime a push to is detected to that branch and then updates the master branch for redeployment.
# Setting up the Site
Now let’s get this site up and running. Never hosted a site before? No problem. Have a fancy custom domain you already own or want to subdomain your Quartz? That’s easy too.
Here, we take advantage of GitHub’s free page hosting to deploy our site. Change baseURL in /config.toml.
Make sure that your baseURL has a trailing /!
| |
If you are using this under a subdomain (e.g. <YOUR-GITHUB-USERNAME>.github.io/quartz), include the trailing /. You need to do this especially if you are using GitHub!
| |
Change cname in /.github/workflows/deploy.yaml. Again, if you don’t have a custom domain to use, you can use <YOUR-USERNAME>.github.io.
Please note that the cname field should not have any path e.g. end with /quartz or have a trailing /.
| |
Have a custom domain? Learn how to set it up with Quartz .
# Ignoring Files
Only want to publish a subset of all of your notes? Don’t worry, Quartz makes this a simple two-step process.
❌ Excluding pages from being published
Now that your Quartz is live, let’s figure out how to make Quartz really yours!
Step 6: 🎨 Customizing Quartz
Having problems? Checkout our FAQ and Troubleshooting guide.